Skip to content
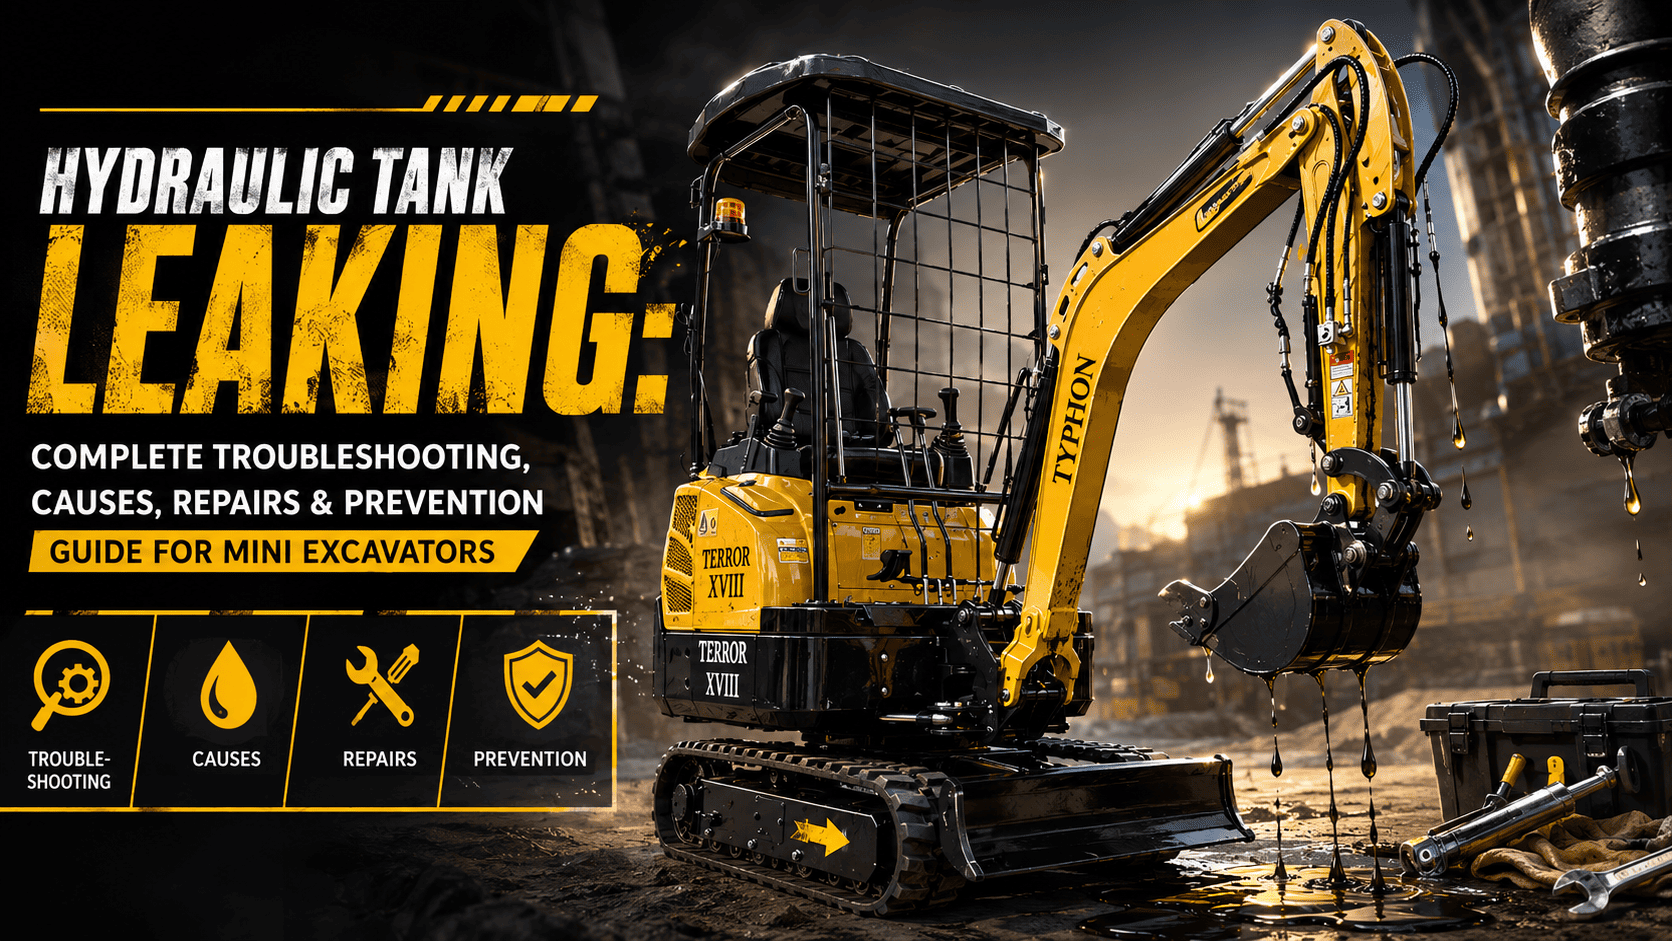
Hydraulic Tank Leaking: Complete Troubleshooting, Causes, Repairs & Prevention Guide for Mini Excavators
You walk up to your mini excavator on a Monday morning, and there it is. A dark, shiny puddle under the machine. Maybe it’s a slow drip off the tank seam. Maybe it’s a wet streak running down the side panel that wasn’t there Friday.
Every operator hits this at some point. And the first question is always the same: can I still run it today?
Sometimes yes. Often no. A hydraulic tank leaking even a small amount is your machine telling you something changed — a seal gave up, a weld cracked, a fitting backed off, or contamination has been quietly chewing through the system for months. Ignore it, and a $40 O-ring turns into a $3,000 pump replacement.
I’ve spent enough time under compact equipment to know that most hydraulic oil leaking problems are catchable early. You just have to know where to look and what you’re looking at. That’s what this guide covers – start to finish, from the five-minute walkaround to the pressure test, and from a roadside temporary patch to a permanent fix.
What causes a hydraulic tank to leak on a mini excavator?
A hydraulic tank leaking is usually caused by worn O-rings or seals, loose or over-torqued fittings, a cracked tank weld, a damaged return line, a clogged breather cap building internal pressure, or corrosion and impact damage to the reservoir shell. Most leaks start small and worsen with vibration, heat, and pressure cycling.
Can I operate a mini excavator with a hydraulic tank leak?
No — not safely. Even a slow hydraulic reservoir leak drops fluid level, introduces air, causes pump cavitation, and creates a fire and slip hazard. Shut the machine down, identify the source, and repair it before returning the excavator to service.
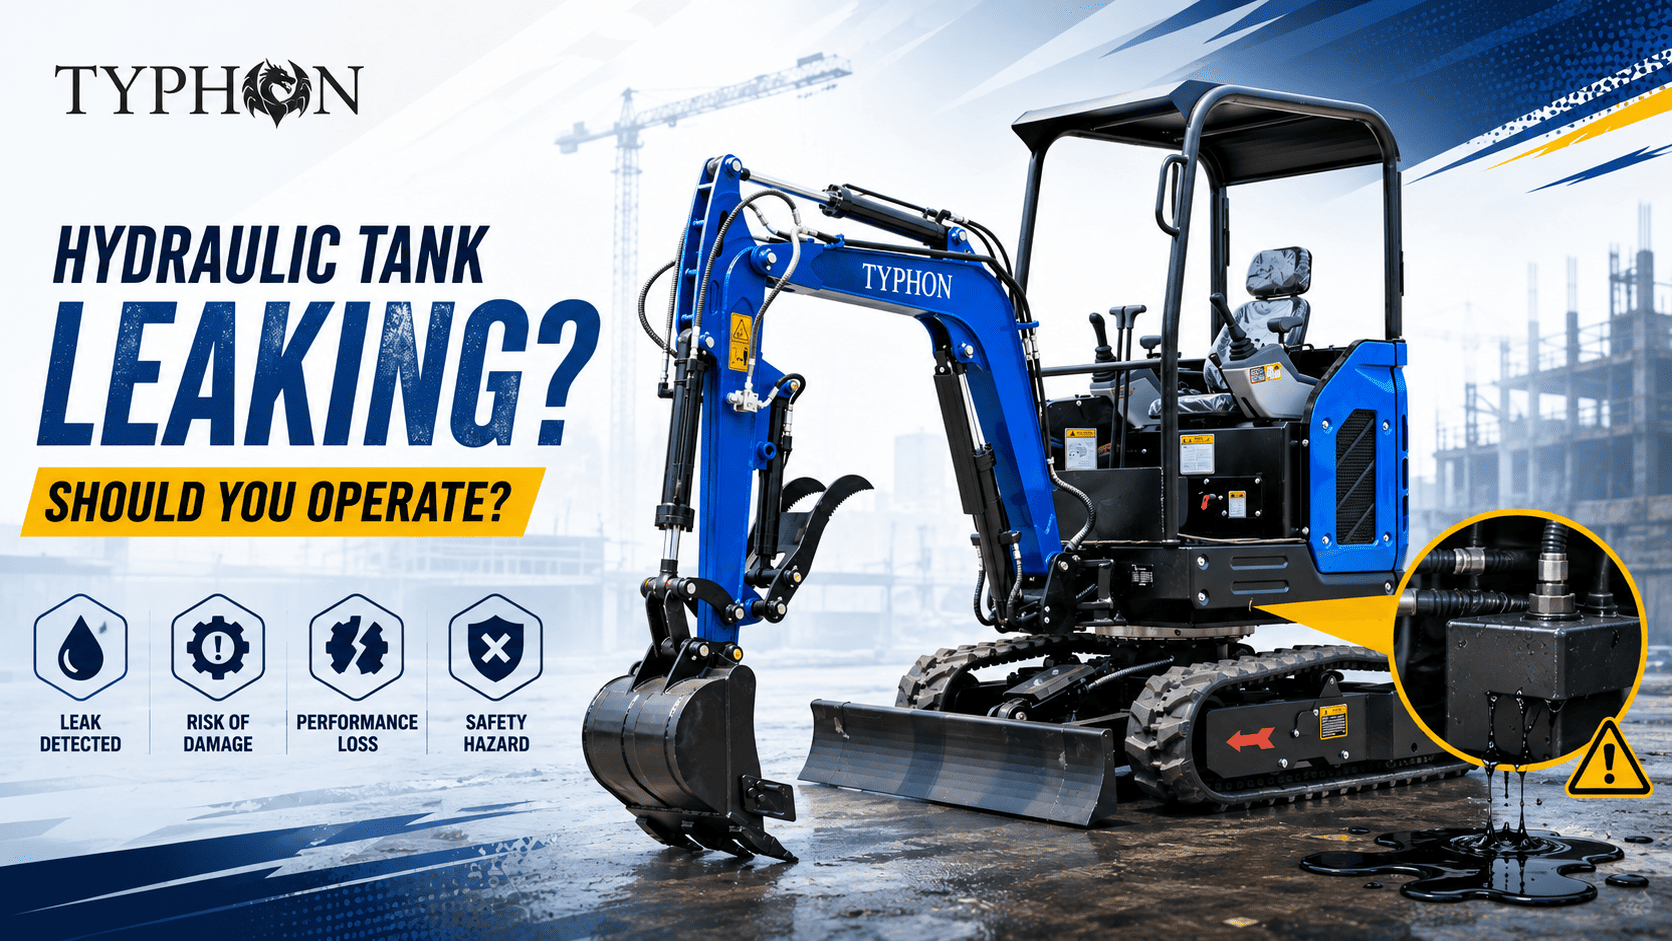
A hydraulic tank leaking on a mini excavator occurs when hydraulic oil escapes the reservoir through a failed seal, a loose fitting, a cracked weld, a damaged hose connection, or a pressurised breather cap. Symptoms include oil puddles, sluggish boom and arm response, whining pumps, foamy fluid, and dropping oil levels. Repairs range from replacing a $10 O-ring to welding or replacing the tank. Prevention comes down to daily inspections, clean fluid, correct torque, and scheduled filter changes.
Table of Contents
- What Is a Hydraulic Tank Leak?
- How Does a Hydraulic Tank Leak Affect Mini Excavators?
- Top 15 Causes of Hydraulic Tank Leaking
- Common Symptoms (Diagnostic Table)
- Leak Severity Rating Table
- Step-by-Step Inspection Guide
- How to Repair a Hydraulic Tank Leak
- Repair Time & Cost Estimates
- Hydraulic Hose Inspection Checklist
- Hydraulic Fitting Inspection Checklist
- O-Ring Inspection Guide
- Hydraulic Oil Quality Inspection
- Pressure Testing Procedure
- Hydraulic Tank Cleaning Process
- 25 Hydraulic Leak Prevention Tips
- Maintenance Schedule Table
- TYPHON Machinery Recommendations
- 18 Common Mistakes to Avoid
- When to Call a Professional Technician
- Frequently Asked Questions
What Is a Hydraulic Tank Leak?
A hydraulic tank leak is any unintended escape of oil from the reservoir – the steel or poly box that stores your machine’s hydraulic fluid between cycles.
People assume the tank is just a bucket. It isn’t. The reservoir does real work: it holds reserve volume, lets entrained air separate out of the oil, dissipates heat through its walls, allows heavy contaminants to settle, and feeds the suction line to the pump. When a hydraulic tank leaking condition develops, every one of those jobs is compromised.
Leaks fall into three practical categories:

1. Static leaks — The machine sits overnight and you find a puddle. Gravity is doing the work. Usually a cracked tank, a failed drain plug gasket, or a sight-glass seal below fluid level.
2. Dynamic leaks — Oil only escapes while the machine is running. Return-line pressure, thermal expansion, and vibration open up a path that stays sealed at rest. These are the sneaky ones.
3. Seepage — No drip, just a permanent wet film that collects dust into a black paste. Technicians call this “weeping.” It’s early-stage failure, and it’s the best time to fix things.
On a compact excavator, the reservoir is usually tucked behind a side panel near the pump, sometimes sharing a housing with the fuel tank. Tight packaging means heat soak, vibration, and limited access — three reasons small excavator hydraulic tank problems get missed until they’re big ones.
Field note: A wet tank does not always mean the tank failed. Oil travels. A leaking return-line fitting three feet above the reservoir will run down and pool on the tank’s top plate, and you’ll swear the tank cracked. Always trace a leak upward before you condemn a component.
How Does a Hydraulic Tank Leak Affect Mini Excavators?
Losing fluid is only the first problem. Here’s the chain reaction that follows.
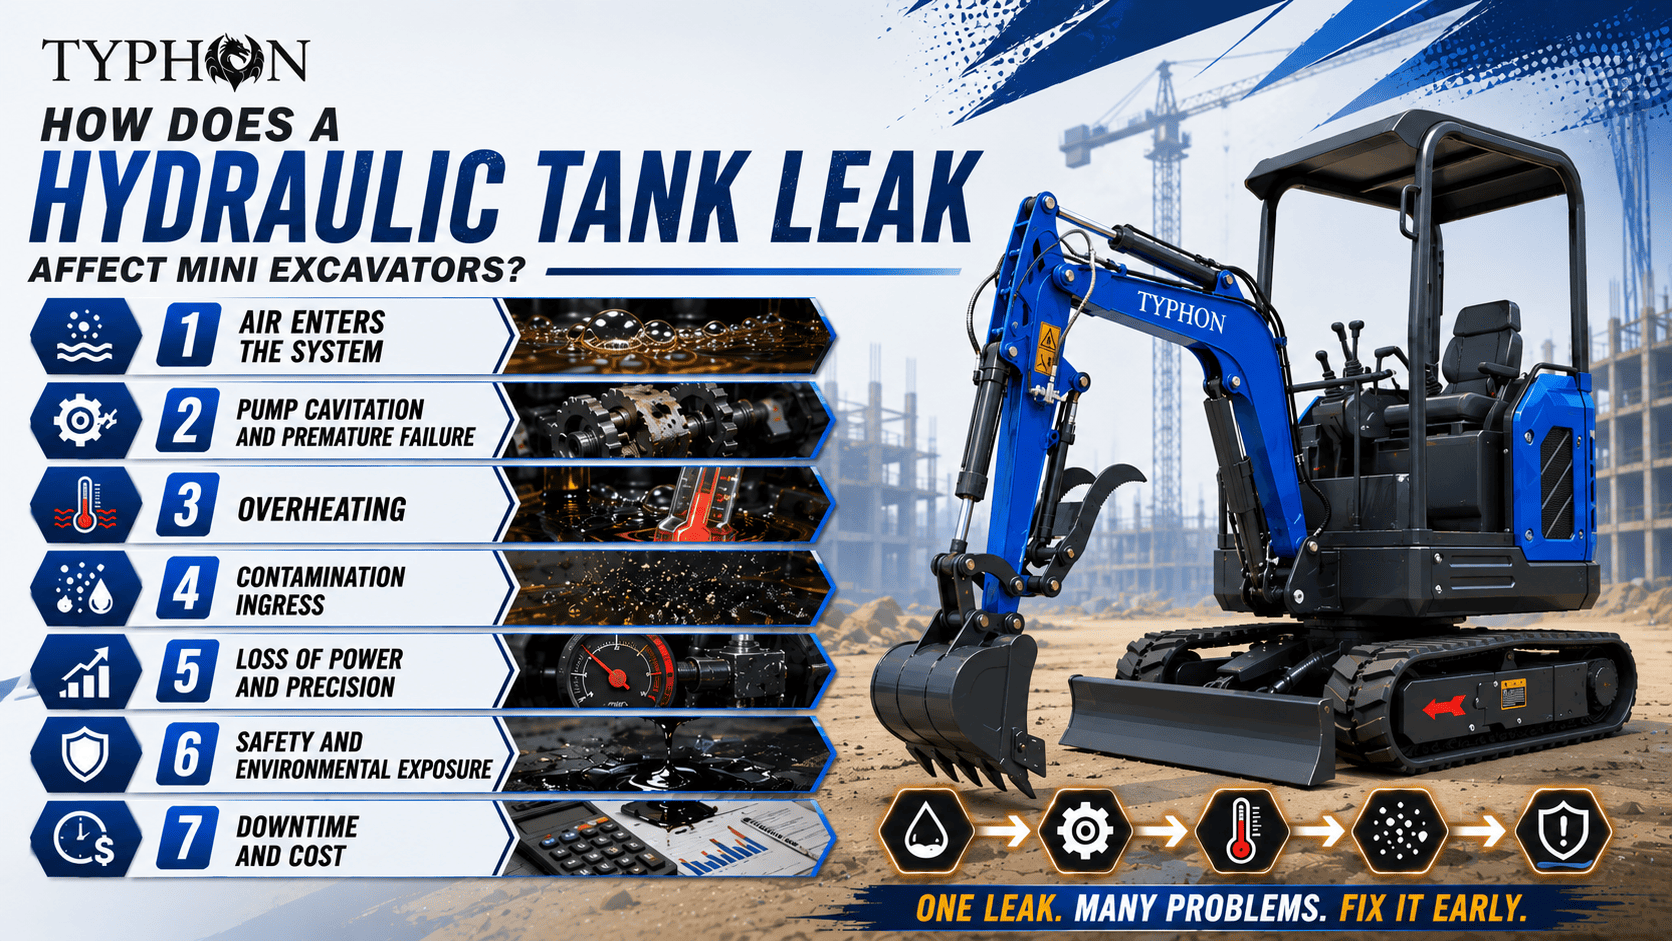
Air Enters the System
This is the big one. As the level drops, the suction strainer eventually breaks the surface and starts pulling air along with oil. Air compresses; oil doesn’t. The result is spongy, jerky control response, oil foaming in the sight glass, and noise.
Pump Cavitation and Premature Failure
Air bubbles collapse violently on the pressure side of the pump. Those micro-implosions hammer internal surfaces and shed metal. Hydraulic pressure loss follows, and pump life shortens dramatically. A pump that should run thousands of hours can be scrap in a few hundred.
Overheating
Less oil means less thermal mass and less surface area for cooling. Fluid overheating breaks down the additive package, thins viscosity, and accelerates hydraulic seal failure everywhere in the system — which creates more leaks. It’s a loop that feeds itself.
Contamination Ingress
A leak path is a two-way street. Wherever oil escapes, dirt and moisture enter. Hydraulic oil contamination is the single largest cause of component wear in mobile hydraulics, and a hydraulic reservoir leak is an open invitation.
Loss of Power and Precision
Boom drift. Slow arm curl. Weak breakout force. Tracks that pull to one side. A hydraulic tank leaking quietly for weeks shows up as performance loss long before anyone spots the puddle. Operators often blame the pump when the actual issue is hydraulic oil loss starving the circuit.
Safety and Environmental Exposure
Hydraulic oil under pressure can inject through skin — a genuine medical emergency requiring immediate surgical attention, not a bandage. OSHA guidance on hydraulic systems consistently emphasizes depressurizing before service and never searching for leaks with bare hands. Add slip hazards, fire risk near hot exhaust, and soil contamination fines, and the case for immediate repair gets easy.
Downtime and Cost
Machine downtime on a rental fleet is lost revenue every single day. A two-hour seal job on Saturday beats a two-week pump rebuild in the middle of a paving contract.
Top 15 Causes of Hydraulic Tank Leaking
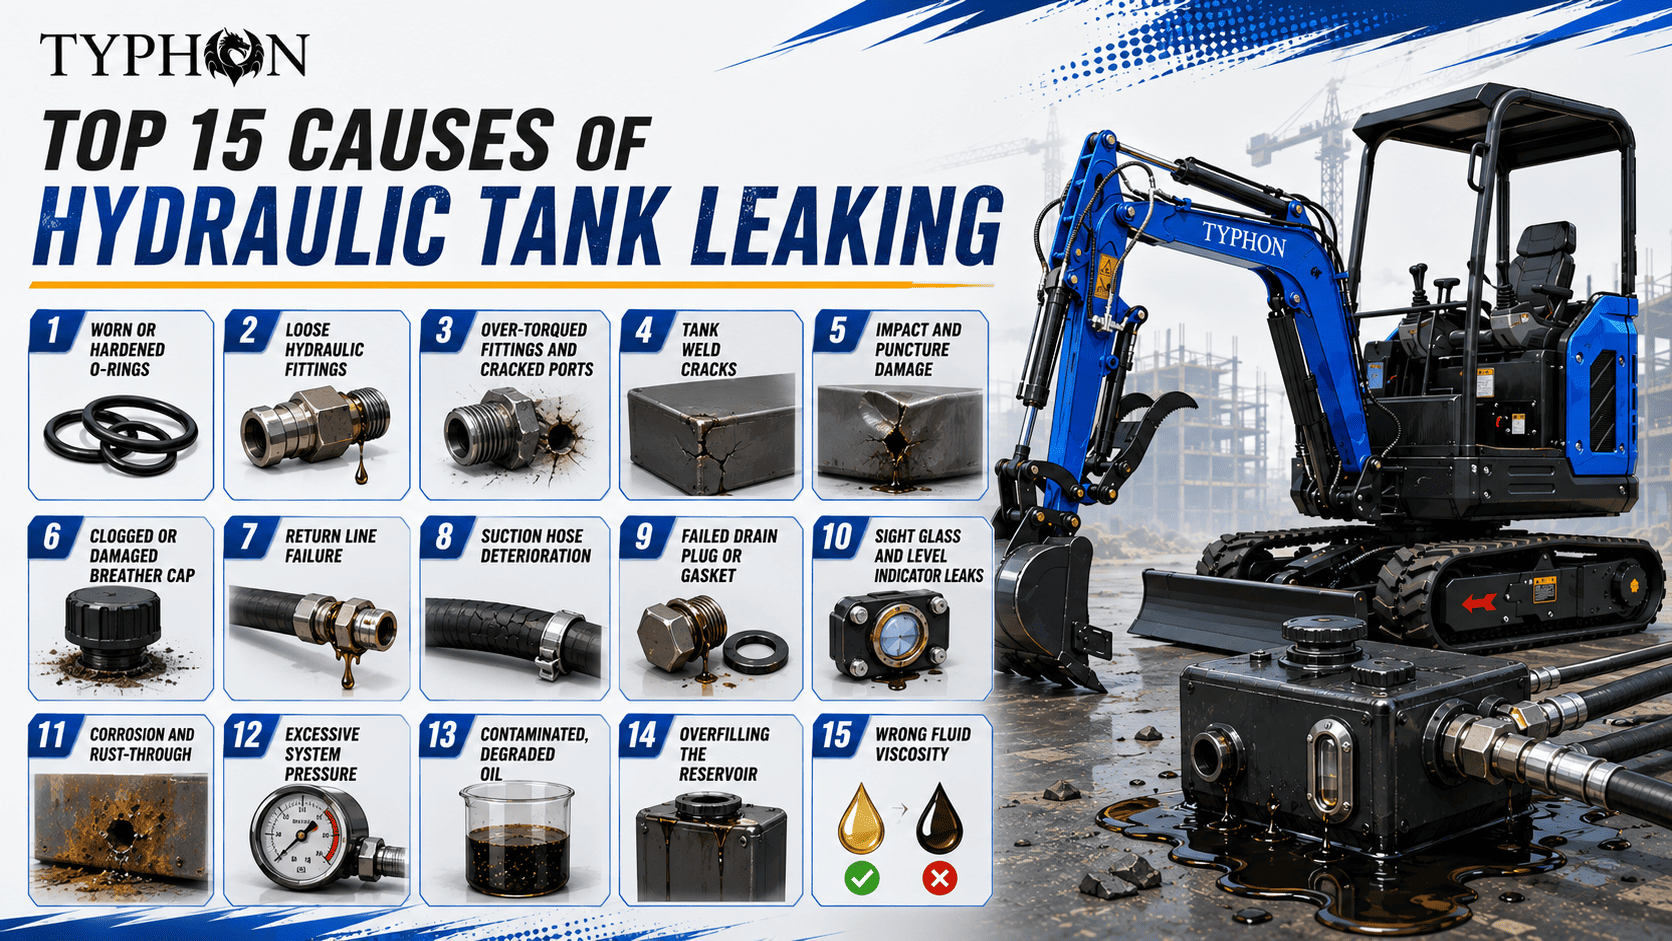
Here’s what actually causes a hydraulic tank leaking on real machines, roughly in order of what shows up on the shop floor.
1. Worn or Hardened O-Rings
The number one cause, by a wide margin. A worn O-ring loses elasticity from heat cycling, takes a compression set, and stops sealing. You’ll find them at the drain plug, sight glass, fill cap, suction flange, and every port on the tank. Rubber that should squish like a fresh gasket instead feels like a hard plastic ring. That’s a failed seal.
2. Loose Hydraulic Fittings
Vibration walks fittings loose over hundreds of hours. A hydraulic fitting leak starts as seepage at the threads and grows. Ironically, the fix isn’t always “tighten it more” — see cause #3.
3. Over-Torqued Fittings and Cracked Ports
Someone finds a weep, cranks down hard, and deforms the sealing surface or cracks the port boss. Now it leaks worse and needs machining or a new tank. JIC 37° flare fittings seal on the cone, not on thread tension — over-tightening flattens the flare and guarantees a leak.
4. Tank Weld Cracks
A tank weld crack typically appears where a mounting bracket, baffle, or port boss meets the shell. Constant vibration concentrates stress at these joints. Hairline cracks weep first, then open under thermal expansion. Older machines and hard-digging applications see this most.
5. Impact and Puncture Damage
Backing into a stump. A rock kicked up by the tracks. A pallet fork tap in the yard. Steel tanks dent and split; poly tanks crack. A cracked hydraulic tank from impact is often obvious once you clean the area.
6. Clogged or Damaged Breather Cap
Underrated and extremely common. The breather cap lets the reservoir equalize pressure as fluid volume changes. Plug it with dust, and the tank pressurizes as oil heats and expands — sometimes to several PSI. That pressure forces oil past seals that were sealing fine at atmospheric. Many “mystery” hydraulic oil tank leak cases are cured by a $25 breather.
7. Return Line Failure
The hydraulic return line dumps hot, aerated oil back into the tank. Its fitting sees thermal cycling and flow-induced vibration. Cracked hose ends, split crimps, or a loose return flange put oil right on top of the reservoir.
8. Suction Hose Deterioration
The hydraulic suction hose operates under vacuum, not pressure — so a failing one may not drip at all. Instead it sucks air in. You get foaming, whining, and cavitation with no visible leak. Soft spots, collapsed sections, and loose clamps are the giveaways.
9. Failed Drain Plug or Gasket
Cross-threaded from a rushed oil change, or the crush washer got reused three times. Sits at the lowest point of the tank, so it leaks whenever there’s fluid in the machine.
10. Sight Glass and Level Indicator Leaks
The sight glass seal is plastic-to-metal, exposed to heat and UV. It hardens, shrinks, and weeps. Cheap to fix, easy to overlook.
11. Corrosion and Rust-Through
Machines stored outside, near coastal air, or used in fertilizer and manure environments corrode from the outside in. Rust under the paint eventually perforates. Poly tanks avoid this but suffer UV embrittlement instead.
12. Excessive System Pressure
A stuck or misadjusted relief valve lets pressure spikes propagate through the circuit. Spikes stress every seal in the system, and the reservoir’s low-pressure seals fail first because they were never designed for it.
13. Contaminated, Degraded Oil
Oil contamination attacks seals chemically and abrasively. Water hydrolyzes certain seal compounds. Burnt oil leaves varnish that prevents proper seating. Silt scores sealing surfaces. Bad fluid quietly manufactures leaks throughout the machine.
14. Overfilling the Reservoir
Filling to the top leaves no air space for thermal expansion and no room for air separation. As oil heats, it expands with nowhere to go and pushes past the fill cap and breather. Then it foams, because there’s no dwell volume for bubbles to release.
15. Wrong Fluid Viscosity
Using an oil that’s too thin for operating temperature reduces film strength and slips past seals that would hold correct-grade fluid. Too thick, and cold-start suction restriction stresses the pump and hoses. This is why manufacturer viscosity specs matter more than price per gallon.
Leak Causes at a Glance
| # | Cause | How It Starts | Difficulty | Typical Fix |
|---|---|---|---|---|
| 1 | Worn O-ring | Heat aging, compression set | Easy | Replace seal |
| 2 | Loose fitting | Vibration over time | Easy | Torque to spec |
| 3 | Over-torqued fitting | Improper repair | Moderate | Replace fitting/port |
| 4 | Tank weld crack | Vibration fatigue | Hard | Professional weld |
| 5 | Impact damage | Job site collision | Hard | Weld or replace tank |
| 6 | Clogged breather | Dust ingress | Easy | Replace breather |
| 7 | Return line failure | Thermal cycling | Moderate | Replace hose/fitting |
| 8 | Suction hose wear | Vacuum + age | Moderate | Replace hose + clamps |
| 9 | Drain plug leak | Cross-thread, old washer | Easy | New plug + gasket |
| 10 | Sight glass seal | UV + heat hardening | Easy | Replace seal/glass |
| 11 | Corrosion | Outdoor storage, chemicals | Hard | Repair or replace tank |
| 12 | Excess pressure | Relief valve fault | Moderate | Test & reset valve |
| 13 | Contaminated oil | Poor filtration | Moderate | Flush + filter change |
| 14 | Overfilling | Service error | Easy | Drain to correct level |
| 15 | Wrong viscosity | Incorrect fluid choice | Easy | Drain & refill correct grade |
Common Symptoms (Diagnostic Table)
A hydraulic tank leaking rarely announces itself with one clean symptom.
| Symptom | Possible Cause | Repair Needed | Severity |
|---|---|---|---|
| Puddle under machine overnight | Cracked tank, drain plug, sight glass seal | Weld repair or seal replacement | 🔴 High |
| Wet film on tank, no drip | Early seepage from weld or port | Clean, monitor, reseal | 🟡 Medium |
| Oil spray while operating | Pressurized fitting or hose failure | Immediate shutdown + replace | 🔴 Critical |
| Foamy, milky oil in sight glass | Air ingestion via suction hose or low level | Find air leak, top up, bleed | 🔴 High |
| Whining or screaming pump | Cavitation from low fluid or air | Stop immediately, diagnose | 🔴 Critical |
| Slow boom or arm response | Low fluid from ongoing leak | Locate leak, refill | 🟠 Medium-High |
| Boom drifts down when parked | Cylinder seal or valve leak (internal) | Seal kit or valve service | 🟠 Medium-High |
| Oil temperature running hot | Low fluid, plugged cooler, degraded oil | Refill, clean cooler, oil change | 🟠 Medium-High |
| Oil on top plate of tank | Return-line fitting leak above tank | Retorque or replace fitting | 🟡 Medium |
| Dust-caked black grime on seams | Long-term slow hydraulic oil leaking | Deep clean, trace, repair | 🟡 Medium |
| Fill cap wet, oil around breather | Clogged breather, overfilled tank | Replace breather, correct level | 🟡 Medium |
| Level drops with no visible leak | Internal leak or vacuum-side suction leak | Professional diagnosis | 🔴 High |
| Burnt smell near reservoir | Overheating from hydraulic oil loss | Stop, cool, investigate | 🔴 Critical |
| Jerky, stuttering cylinder movement | Air in system from leak path | Bleed system, fix source | 🟠 Medium-High |
| Track pulls to one side | Pressure loss in travel circuit | Pressure test both sides | 🟠 Medium-High |
Leak Severity Rating Table
Not every hydraulic tank leaking situation stops the job. Use this to make the call.
| Severity | What You See | Fluid Loss Rate | Operate? | Response Time |
|---|---|---|---|---|
| Level 1 – Seepage | Damp film, no drop forms | Negligible | Yes, with monitoring | Fix within 2 weeks |
| Level 2 – Weeping | Drop forms but doesn’t fall | Very slow | Short-term only | Fix within 1 week |
| Level 3 – Dripping | Drops fall, small puddle | Measurable daily loss | Not recommended | Fix within 48 hours |
| Level 4 – Running | Steady stream, visible trail | Rapid | No | Immediate |
| Level 5 – Spraying | Pressurized mist or jet | Severe | Absolutely not | Emergency shutdown |
⚠️ Safety warning: Never use your hand to find a pressurized leak. A pinhole jet of hydraulic oil at operating pressure penetrates skin instantly and causes fluid injection injury — which requires emergency surgery within hours to avoid amputation. Use a piece of cardboard held at arm’s length, and always wear eye protection.
Step-by-Step Inspection Guide
Good inspection habits catch a hydraulic tank leaking issue while it’s still a five-dollar fix. Here’s the routine that works.
Daily Inspection (5–10 Minutes, Before Startup)
- Walk the perimeter. Look at the ground under the machine before you move it. Ground stains are your earliest warning.
- Check the sight glass with the machine level, boom down, and engine off. Note the level against the marks.
- Look at the oil’s appearance — clear amber is healthy. Dark, cloudy, or foamy is not.
- Scan the tank exterior for wet spots, especially around the drain plug, fill cap, sight glass, and welded seams.
- Inspect visible hoses for wet ends, chafe marks, and abrasion against the frame.
- Check the breather cap — remove it and confirm it’s not packed with dust.
- Feel around fittings (engine off, system depressurized, gloves on) for dampness.
- Note the hour meter and log anything you find. A written record turns guesswork into diagnosis.
Weekly Inspection (20–30 Minutes)
- Pressure-wash the reservoir area and let it dry. You cannot inspect what you can’t see. Clean metal shows a fresh leak in hours.
- Trace every hose from the tank to the pump and back, running a rag along its length to find damp spots.
- Check hose clamps and suction connections for tightness — especially the vacuum side, where leaks pull air instead of pushing oil.
- Inspect the return line and its connection at the tank for staining.
- Verify fill cap and breather seal condition.
- Check the hydraulic cooler for debris packing, bent fins, and oily residue.
- Look at all cylinder rods for scoring and wiper seal leakage — a wet rod today is a seal kit next month.
- Confirm fluid level at operating temperature, and compare against last week’s reading. A consistent drop means a leak somewhere, visible or not.
Monthly Inspection (1–2 Hours)
- Remove side panels for full reservoir access — most leaks hide where the light doesn’t reach.
- Inspect welded seams closely with a bright light. Look for hairline tank weld crack indications and rust blooming through paint.
- Pull a fluid sample from mid-tank into a clean glass jar. Let it sit an hour and examine for water, sludge, and particles.
- Check filter condition and bypass indicators.
- Torque-check critical fittings with a torque wrench — never by feel.
- Inspect the tank mounting brackets and isolators. Worn rubber mounts transmit vibration straight into the tank shell and cause cracks.
- Examine the suction strainer if accessible.
- Review your leak log for patterns. Recurring leaks in one area point to a root cause, not bad luck.
Professional Inspection (Every 500 Hours or Annually)
Bring in a qualified technician for:
- Full system pressure testing against manufacturer specifications
- Laboratory oil analysis (particle count to ISO cleanliness standards, water content, viscosity, wear metals)
- Flow testing of pump and motors
- Relief valve and control valve verification
- Internal tank inspection and, if warranted, professional reservoir cleaning
- Thermal imaging to spot restricted circuits and abnormal heat
- Structural assessment of tank welds and mounts
Inspection Checklist Summary
| Check Point | Daily | Weekly | Monthly | Annual |
|---|---|---|---|---|
| Ground under machine | ✅ | ✅ | ✅ | ✅ |
| Fluid level in sight glass | ✅ | ✅ | ✅ | ✅ |
| Oil color and clarity | ✅ | ✅ | ✅ | ✅ |
| Visible hose condition | ✅ | ✅ | ✅ | ✅ |
| Breather cap clear | ✅ | ✅ | ✅ | ✅ |
| Tank exterior wet spots | ✅ | ✅ | ✅ | ✅ |
| Reservoir area cleaned | — | ✅ | ✅ | ✅ |
| Full hose routing traced | — | ✅ | ✅ | ✅ |
| Cooler fins clear | — | ✅ | ✅ | ✅ |
| Cylinder rod seals | — | ✅ | ✅ | ✅ |
| Weld seam inspection | — | — | ✅ | ✅ |
| Fitting torque verification | — | — | ✅ | ✅ |
| Fluid sample analysis | — | — | ✅ | ✅ |
| Tank mounts and isolators | — | — | ✅ | ✅ |
| System pressure test | — | — | — | ✅ |
| Lab oil analysis | — | — | — | ✅ |
| Relief valve verification | — | — | — | ✅ |
How to Repair a Hydraulic Tank Leak
Before anything else: park level, lower the boom and bucket to the ground, shut off the engine, relieve system pressure by cycling the control levers, remove the key, and let the oil cool. Hot hydraulic oil causes serious burns, and stored pressure in accumulators and cylinders doesn’t care that the engine is off. Follow lockout/tagout practices consistent with OSHA’s control-of-hazardous-energy guidance before you touch a fitting.
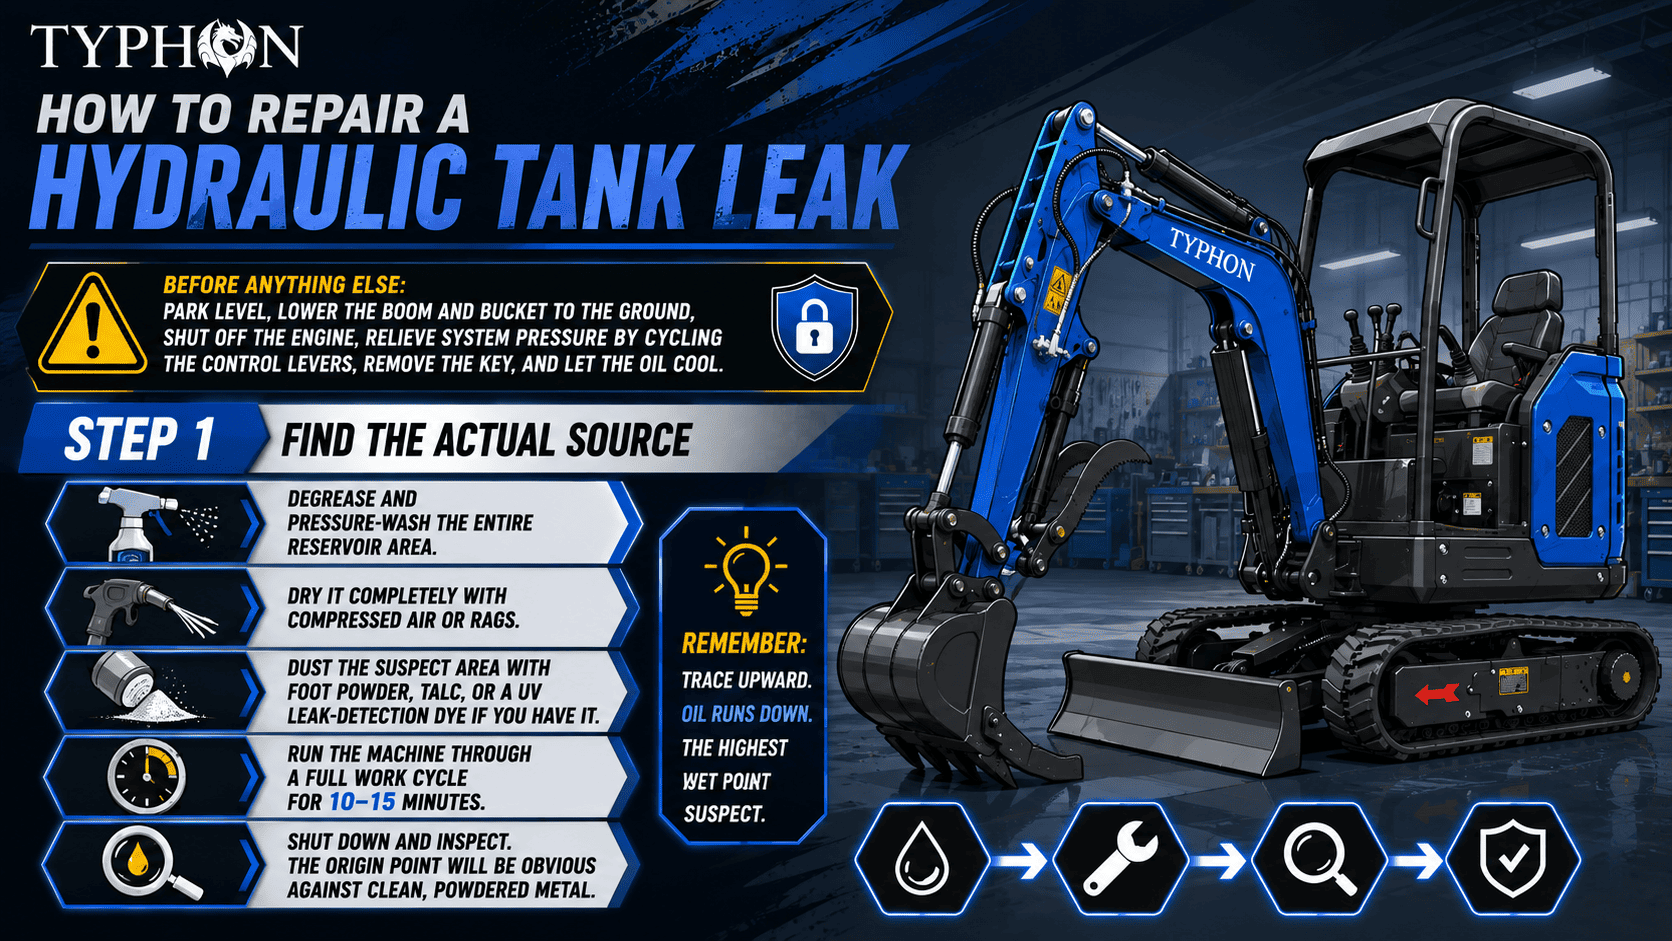
Once the machine is safe to work on, repairing a hydraulic tank leaking condition follows the same order every time: find it, fix it properly, then verify it.
Step 1: Find the Actual Source
- Degrease and pressure-wash the entire reservoir area.
- Dry it completely with compressed air or rags.
- Dust the suspect area with foot powder, talc, or a UV leak-detection dye if you have it.
- Run the machine through a full work cycle for 10–15 minutes.
- Shut down and inspect. The origin point will be obvious against clean, powdered metal.
Remember: trace upward. Oil runs down. The highest wet point is your suspect.
Temporary Repairs (Get Off the Job Site — Nothing More)
Temporary fixes exist so you can move the machine to a shop or finish a critical pour. They are not repairs.
| Method | Best For | Realistic Duration | Notes |
|---|---|---|---|
| Two-part epoxy putty | Small pinholes, hairline cracks | Hours to a few days | Surface must be bone dry and abraded |
| Hydraulic-rated tank sealant | Seepage on flat surfaces | Days | Won’t hold on flexing or high-vibration areas |
| Rubber patch + hose clamp | Poly tank splits | Very short term | Emergency only |
| Retorque fitting to spec | Loose fittings | Can be permanent | Only if sealing surface is undamaged |
| Fresh O-ring | Seal weep | Often permanent | The best “quick” fix there is |
Rules for temporary repair:
- Never patch a leak and forget it. Log it and schedule the real fix.
- Never patch a pressurized line — reservoirs are low pressure; hoses are not.
- Check the level constantly while running on a patch.
- Assume it will fail at the worst possible moment, and plan accordingly.
Permanent Repairs
A. Seal and O-Ring Replacement (most common, most successful)
- Drain the tank into clean, labeled containers.
- Remove the failed component (drain plug, sight glass, flange, port fitting).
- Clean the sealing surface completely — no old gasket material, no varnish.
- Inspect the surface for scratches, pitting, or scoring. A damaged land will leak with a brand-new seal.
- Install the correct new seal, lightly lubricated with clean hydraulic oil.
- Torque to the manufacturer’s specification with a torque wrench.
- Refill with the specified fluid, run, and re-inspect.
B. Fitting Replacement Replace, don’t fight. Match thread type (NPT, JIC, ORFS, BSP) exactly. Use thread sealant only on tapered pipe threads, and never on JIC or O-ring face seal fittings, where sealant contaminates the system and does nothing useful. Keep sealant two threads back from the end so it doesn’t shed into the oil.
C. Hose Replacement Match length, inner diameter, pressure rating, and end configuration. Route to avoid abrasion and maintain the minimum bend radius. Use new clamps. Flush the new assembly before installation — new hose is not clean hose.
When Welding a Hydraulic Tank Is Safe
Welding a reservoir is legitimate for structural cracks — but only under strict conditions.
Welding is acceptable when:
- The tank is a steel weldment (never attempt on poly or aluminum without proper process and equipment)
- The tank is completely drained, flushed, steam-cleaned, and vented
- All residual oil vapor has been purged — hydraulic oil vapor is flammable and reservoirs have exploded during careless repairs
- A certified welder performs the work with a process appropriate to the material and thickness
- Ports, hoses, sensors, and seals are removed or fully heat-shielded
- The tank is cleaned inside after welding, because weld spatter and scale inside a reservoir goes straight into your pump
Do not weld when:
- The tank has fuel-side contact or shares a housing with the fuel tank
- The crack runs through a port boss or mounting boss under load
- The tank is corroded thin around the crack — you’ll blow holes, not fill them
- The material is polyethylene (plastic welding is a different process entirely)
- You cannot fully clean and purge the interior
⚠️ This is the one repair I tell people not to DIY. A residual-vapor explosion in a “drained” tank is a real event that has injured experienced people. Send it out.
When Tank Replacement Is Necessary
Replace the reservoir when:
- Corrosion has thinned multiple areas — patch one, the next lets go
- Cracks radiate from several stress points
- The tank has been welded before and cracked again nearby
- Impact damage has distorted the shell or baffles
- A poly tank is cracked, UV-embrittled, or chalky
- Internal contamination cannot be removed by cleaning
- Repair cost approaches 60–70% of replacement cost
Repair Time & Cost Estimates
These are general market ranges for planning purposes only — not a quote. Actual costs vary by machine model, region, dealer labor rate, and parts availability. Get a written estimate from your dealer.
| Repair | DIY Time | Shop Time | Typical Parts Cost | Typical Total (Shop) |
|---|---|---|---|---|
| Replace O-ring / seal | 30–60 min | 0.5–1 hr | $5–$40 | $80–$180 |
| Retorque / replace fitting | 20–45 min | 0.5 hr | $10–$60 | $70–$150 |
| Replace breather cap | 10 min | 0.25 hr | $15–$60 | $40–$100 |
| Replace drain plug + gasket | 20 min | 0.5 hr | $10–$35 | $60–$130 |
| Replace sight glass | 30–45 min | 0.5–1 hr | $20–$90 | $90–$200 |
| Replace hydraulic hose | 1–2 hrs | 1–2 hrs | $40–$250 | $150–$500 |
| Replace suction hose + clamps | 1–2 hrs | 1.5–2 hrs | $50–$200 | $180–$450 |
| Full fluid + filter change | 1–2 hrs | 1.5–2 hrs | $90–$350 | $250–$650 |
| Professional tank weld repair | Not advised | 3–6 hrs | $50–$150 | $400–$1,200 |
| Complete tank replacement | Not advised | 4–10 hrs | $500–$2,500 | $1,200–$4,500 |
| System flush + reservoir clean | 3–5 hrs | 4–8 hrs | $150–$500 | $600–$1,500 |
| Pump replacement (leak neglected) | Not advised | 6–14 hrs | $1,200–$5,000 | $2,500–$8,000+ |
Look at the last two rows against the first three. That gap is the entire argument for fixing a hydraulic tank leaking problem the week you find it.
Hydraulic Hose Inspection Checklist
Run through this monthly, and any time you suspect hydraulic oil leaking. Hoses are the second most common source of a hydraulic tank leaking complaint after seals.
- [ ] Cover abrasion — worn outer cover exposing reinforcement wire means replace now, no exceptions
- [ ] Cracking or crazing on the cover, especially at bends
- [ ] Blisters or bulges — internal failure already in progress
- [ ] Soft or spongy sections — reinforcement has separated
- [ ] Stiff, brittle, hardened areas — heat damage
- [ ] Kinks or crushed sections from being pinched
- [ ] Twisted installation — hose must never be installed with a twist
- [ ] Bend radius at or above the manufacturer’s minimum
- [ ] Fitting corrosion at the crimp collar
- [ ] Oil weeping at the crimp — the crimp is failing, not the hose
- [ ] Loose or pulled-back fittings
- [ ] Chafe points where the hose contacts the frame, tracks, or another hose
- [ ] Missing protective sleeves or clamps
- [ ] Contact with hot surfaces like the exhaust or manifold
- [ ] Correct pressure rating stamped on the layline
- [ ] Age — many manufacturers advise replacement at 5–7 years even if the hose looks fine
- [ ] Mixed-brand ends on a single assembly (a common failure source)
- [ ] Suction hose vacuum integrity — check for collapse under load
Replace immediately if: wire is showing, the crimp is weeping, the cover is blistered, or you find any hose contacting a moving part.
Hydraulic Fitting Inspection Checklist
A hydraulic fitting leak is the easiest thing on this list to fix and the easiest to fix wrong.
- [ ] Identify the fitting type — NPT, JIC 37°, ORFS, BSPP, SAE O-ring boss. They are not interchangeable.
- [ ] Check for damaged threads — galling, stripping, cross-threading
- [ ] Inspect the sealing surface — the JIC cone, the ORFS face, the O-ring groove
- [ ] Look for cracked port bosses on the tank or valve body
- [ ] Check for wrench marks and deformation from over-tightening
- [ ] Confirm correct torque with a torque wrench, not by feel
- [ ] Look for adapter stacking — three adapters chained together means three leak paths
- [ ] Check the O-ring on ORFS and O-ring boss fittings for cuts, flats, and hardening
- [ ] Look for thread sealant misuse — sealant on JIC or ORFS threads is wrong and contaminates the oil
- [ ] Check for corrosion and dissimilar-metal contact
- [ ] Verify alignment — a fitting pulled sideways by a stiff hose will always leak
- [ ] Confirm pressure rating matches or exceeds the circuit
The single biggest fitting mistake: treating every leak as under-tightening. On flare and face-seal fittings, over-torque causes leaks by deforming the sealing surface. Loosen, inspect the seal face, replace the O-ring, then torque to spec.
O-Ring Inspection Guide
O-rings are the cheapest part on the machine and the single most common cause of a hydraulic tank leaking condition. Learn to read them.
What a Failed O-Ring Looks Like
| Appearance | Cause | Action |
|---|---|---|
| Flattened, no longer round | Compression set from heat/age | Replace; consider higher-temp material |
| Hard, brittle, cracks when bent | Heat aging or fluid incompatibility | Replace; verify fluid and material match |
| Swollen, soft, mushy | Chemical incompatibility with fluid | Replace with correct compound (NBR/FKM/HNBR) |
| Nibbled or chewed edges | Extrusion from excess pressure/clearance | Replace + add backup ring; check relief valve |
| Spiral cut or twisted | Improper installation, dry fitting | Replace, lubricate before assembly |
| Cut or nicked | Sharp thread edges during install | Replace; deburr the groove |
| Sticky, tacky surface | Fluid breakdown, overheating | Replace + investigate fluid overheating |
O-Ring Replacement Best Practices
- Always replace — never reuse an O-ring, even one that “looks fine.”
- Match material to the fluid: nitrile (NBR) for standard petroleum hydraulic oil, fluorocarbon (FKM/Viton) for high heat, and always confirm against the manual for biodegradable or fire-resistant fluids.
- Match size precisely. A near-fit is a future leak.
- Lubricate with clean system oil before installation — never grease, never petroleum jelly.
- Never roll an O-ring over sharp threads. Use an installation sleeve or tape the threads.
- Inspect the groove for burrs, corrosion, and old seal material.
- Store spares in sealed bags away from sunlight, ozone sources, and heat. Rubber ages on the shelf.
- Keep a labeled assortment kit on hand — it turns a two-day downtime into a twenty-minute fix.
Hydraulic Oil Quality Inspection
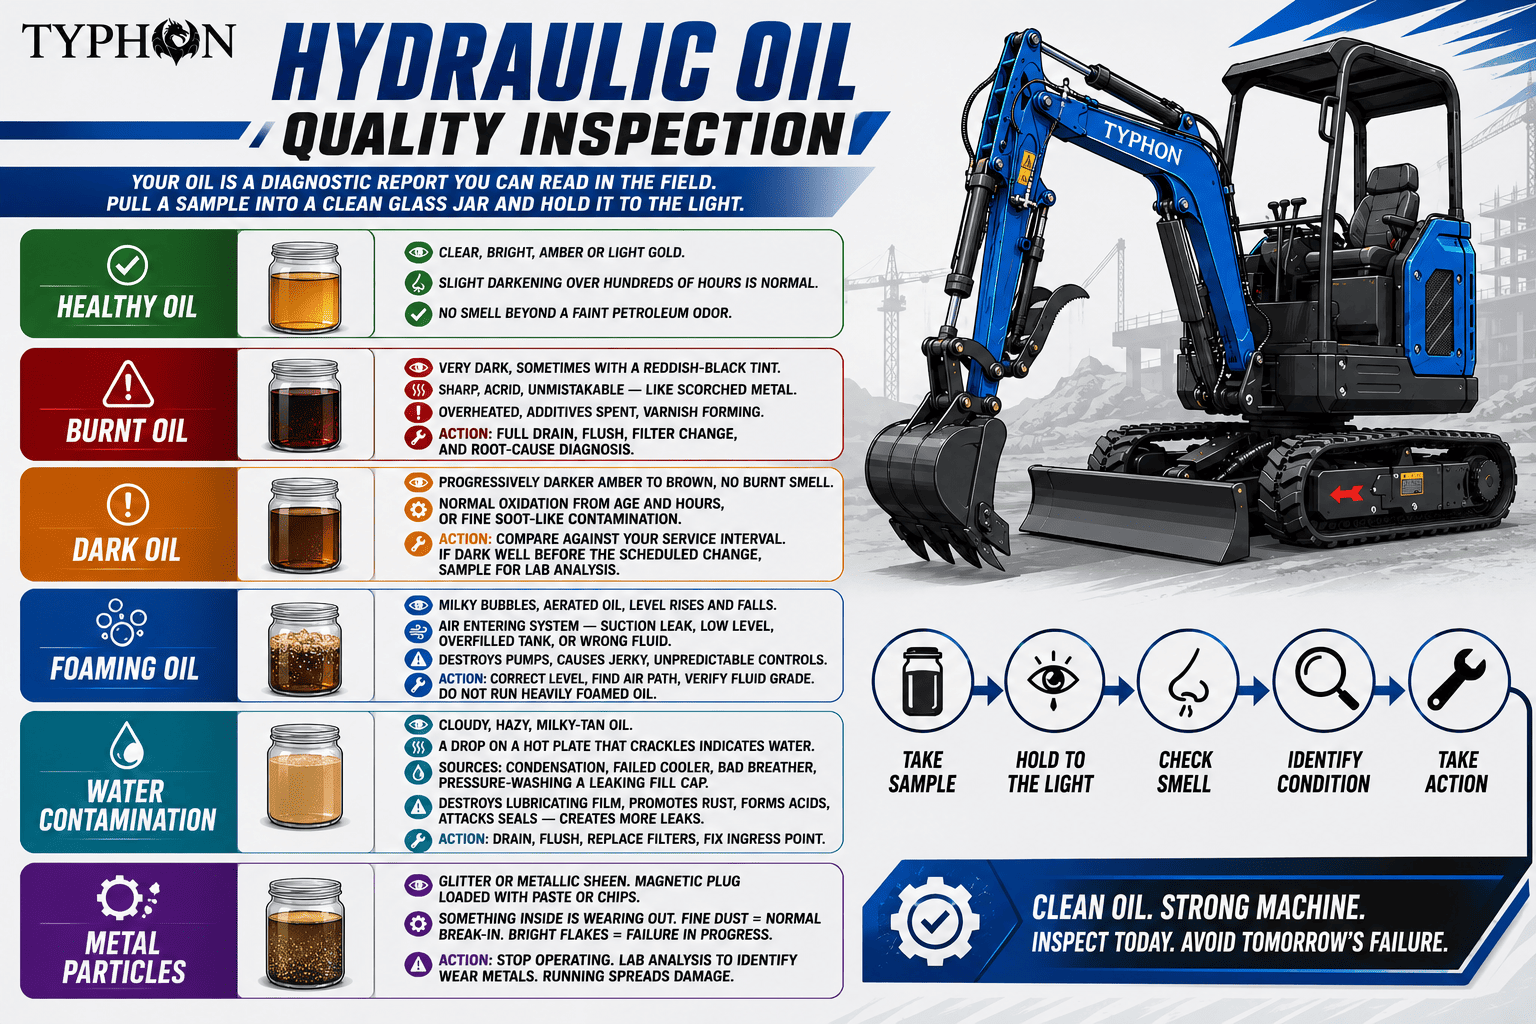
Your oil is a diagnostic report you can read in the field. Pull a sample into a clean glass jar and hold it to the light.
Healthy Oil
Clear, bright, amber or light gold. Slight darkening over hundreds of hours is normal. No smell beyond a faint petroleum odor.
Burnt Oil
What you see: Very dark, sometimes with a reddish-black tint. What you smell: Sharp, acrid, unmistakable — like scorched metal. What it means: The oil has been overheated, additives are spent, and varnish is forming on internal surfaces. Burnt oil no longer protects. It’s also a strong indicator of an ongoing hydraulic tank leaking condition that dropped the level and reduced cooling capacity. Action: Full drain, flush, filter change, and root-cause diagnosis of the overheating.
Dark Oil (Not Burnt)
What you see: Progressively darker amber to brown, no burnt smell. What it means: Normal oxidation from age and hours, or fine soot-like contamination. Action: Compare against your service interval. If dark well before the scheduled change, sample for lab analysis.
Foaming Oil
What you see: Milky bubbles in the sight glass, oil that looks aerated, level that rises and falls. What it means: Air is entering the system — usually through a hydraulic suction hose leak, a low fluid level exposing the strainer, an overfilled tank, or the wrong fluid with a failed anti-foam additive. Why it matters: Oil foaming destroys pumps through cavitation and makes controls jerky and unpredictable. Action: Correct the level, find the air path, verify fluid grade. Do not run heavily foamed oil.
Water Contamination
What you see: Cloudy, hazy, milky-tan oil. Sometimes free water at the bottom of a settled sample. Field test: A drop on a hot plate that crackles indicates water. Sources: Condensation in a partially empty tank, a failed cooler, a bad breather, or pressure-washing a leaking fill cap. Why it matters: Water destroys lubricating film, promotes rust, forms acids, and attacks certain seal compounds — creating more leaks. Action: Drain, flush, replace filters, and fix the ingress point.
Metal Particles
What you see: Glitter or a fine metallic sheen when you swirl the sample. Magnetic drain plug loaded with paste or chips. What it means: Something inside is wearing out. Fine grey dust may be normal break-in wear; bright flakes or chips mean pump, motor, or valve failure in progress. Action: Stop operating. Lab analysis to identify the wear metals. Running a machine that’s making chips distributes them through every component in the circuit.
Field Oil Quality Reference
| Observation | Likely Meaning | Urgency |
|---|---|---|
| Clear amber | Healthy | Routine |
| Slightly darker, clear | Normal aging | Routine |
| Dark, no odor | Oxidation / due for change | Schedule change |
| Very dark + burnt smell | Severe overheating | Immediate service |
| Milky white/tan | Water contamination | Immediate service |
| Foamy with bubbles | Air ingestion | Stop and diagnose |
| Visible glitter | Component wear | Stop immediately |
| Sludge at jar bottom | Heavy contamination | Full flush required |
| Varnish film on parts | Thermal degradation | Flush + cool-system repair |
Pressure Testing Procedure
Pressure testing tells you whether the system is actually performing — and whether excess pressure is what’s blowing your seals out.
Safety Precautions First
- Complete lockout/tagout before connecting or disconnecting anything
- Lower all attachments to the ground and relieve stored pressure
- Wear safety glasses, gloves, and long sleeves — no exceptions
- Never search for leaks with your hands; use cardboard at arm’s length
- Confirm test gauge rating exceeds maximum expected system pressure
- Keep bystanders clear of the machine
- Never adjust a relief valve without the manufacturer’s specification in front of you
- Allow oil to cool to a safe handling temperature before connecting fittings
Required Tools
- Hydraulic pressure gauge kit with the correct range for your machine
- Test port adapters matching your system’s fittings (ports are commonly available on the pump and main valve)
- Infrared thermometer for oil temperature
- Flow meter, if available, for pump performance testing
- Torque wrench
- Clean rags, catch pan, and absorbent material
- The machine’s service manual
General Procedure
- Check and correct the fluid level and confirm the correct fluid grade is in the machine.
- Locate the test ports specified in your service manual.
- Connect the gauge with the engine off and pressure relieved.
- Start the engine and bring the oil to normal operating temperature — cold readings are meaningless.
- Record standby (neutral) pressure.
- Cycle each function and record working pressure under load.
- Carefully deadhead a function against its stop to read relief valve setting, following the manual’s method and time limits.
- Compare every reading to your manual’s specification.
- Shut down, relieve pressure, and disconnect the gauge.
- Log the results with the hour meter reading.
Interpreting Results
| Finding | Likely Cause |
|---|---|
| Pressure below spec | Worn pump, internal leakage, low fluid, relief valve set low or stuck open |
| Pressure above spec | Relief valve set too high or stuck closed — a direct cause of blown seals and a hydraulic tank leaking condition |
| Erratic, fluctuating needle | Air in the system, cavitation, sticking valve |
| Pressure drops under load | Pump wear, internal cylinder bypass |
| Normal pressure, weak function | Cylinder seal bypass or valve spool wear |
Acceptable ranges vary by machine and circuit — implement, travel, swing, and auxiliary circuits all differ. Always use the pressure values published in your specific model’s service manual rather than a generic figure from the internet.
Common Pressure Testing Mistakes
- Testing at cold oil temperature and misreading normal viscosity effects as a fault
- Using a gauge with too low a range, damaging the gauge and getting a bad reading
- Adjusting a relief valve “a little” without a spec to work toward
- Deadheading a function too long and cooking the oil
- Ignoring fluid level and condition before testing
- Testing one circuit and assuming the rest of the machine matches
- Reusing dirty test fittings and introducing contamination
- No written record, so the next test has nothing to compare against
Hydraulic Tank Cleaning Process
If you’ve had contamination, a major component failure, or a long-neglected hydraulic reservoir leak, cleaning the tank is part of the repair. Skip it, and the debris you left inside kills the new parts.
Step 1 — Prepare. Park level, cool the machine, relieve all pressure, and stage clean catch containers plus enough new fluid and filters to refill.
Step 2 — Drain completely. Remove the drain plug and let it fully empty. Cycle nothing — just let gravity work. Dispose of used oil through a licensed recycler.
Step 3 — Open the tank. Remove the access cover or top plate. Note the position of the suction strainer and return diffuser before removing anything.
Step 4 — Remove and clean internals. Take out the suction strainer and clean it thoroughly, or replace it. Inspect baffles for cracks and debris buildup.
Step 5 — Inspect the interior. Use a bright light and a bore scope if you have one. You’re looking for rust, varnish, sludge, water pooling, weld spatter from past repairs, and cracks visible from the inside.
Step 6 — Wipe, don’t wash. Use lint-free cloths. Never use shop rags that shed fibers, and never use compressed shop air to “blow it out” — that drives moisture and dirt in. If a solvent flush is required, use a hydraulic-compatible flushing fluid and remove every trace afterward.
Step 7 — Address rust and varnish. Light surface rust can be cleaned mechanically. Heavy scaling or perforation means the tank needs professional refurbishment or replacement.
Step 8 — Reassemble with new seals. Every gasket and O-ring you disturbed gets replaced. Torque the cover to spec in a cross pattern.
Step 9 — Replace all filters. Return filter, suction strainer, pressure filter, and the breather cap. All of them.
Step 10 — Refill through filtration. Fill using a filter cart or a clean transfer pump with filtration if possible. Pouring straight from a drum through a funnel introduces contamination at the exact moment you were trying to eliminate it.
Step 11 — Bleed and verify. Start the engine, idle for several minutes, cycle every function slowly through its full stroke several times to purge air, then shut down, recheck the level, and inspect for leaks.
Step 12 — Recheck after 10 hours. Then again at 50 hours. Fresh systems settle, fittings relax, and early inspection catches problems while they’re small.
25 Hydraulic Leak Prevention Tips
Almost every hydraulic tank leaking problem is preventable. These habits cost minutes and save thousands.
- Walk around the machine every single morning before startup. This one habit prevents more failures than any tool you own.
- Keep the reservoir area clean. Clean metal reveals a new leak within hours; grimy metal hides one for months.
- Check fluid level daily with the machine level and the boom down.
- Never overfill. Fill to the manufacturer’s mark, not to the top.
- Use the specified fluid grade for your machine and climate. Viscosity is a specification, not a preference.
- Never mix fluid types or brands unless compatibility is confirmed. Mixed additive packages can gel and attack seals.
- Replace the breather cap on schedule. It’s the cheapest leak prevention on the machine.
- Change filters at the manufacturer’s interval — not when performance drops.
- Torque every fitting to specification with a torque wrench.
- Never over-tighten flare or face-seal fittings. You’ll cause the leak you’re trying to stop.
- Replace O-rings whenever you break a connection. Every time.
- Keep spare seals, O-rings, and a hose or two on hand for common sizes.
- Route hoses to avoid chafing and clamp them properly.
- Respect minimum bend radius on every hose.
- Add protective sleeving anywhere a hose passes near a frame edge or moving part.
- Warm the machine up before working it hard. TYPHON’s own operation manuals call for preheating and moving functions gently when hydraulic oil is cold — cold, thick oil spikes pressure and stresses seals.
- Keep the hydraulic cooler clean of dust, chaff, and mud. Heat is the enemy of every seal in the system.
- Fix small leaks the week you find them. Seepage always becomes dripping.
- Store the machine under cover or use a machine cover. UV and weather degrade seals, hoses, and poly tanks.
- Cap and plug hoses whenever you disconnect them — even for five minutes.
- Filter new oil before it goes in. Fresh oil out of a drum is often dirtier than the oil you drained.
- Wipe quick couplers before connecting attachments. That’s the number one dirt entry point on any machine with auxiliary hydraulics.
- Inspect tank mounts and vibration isolators. Worn mounts crack tanks.
- Run an oil analysis program if you operate a fleet. It catches wear before it becomes a leak.
- Keep written maintenance records with hours, dates, parts, and observations. Documentation turns troubleshooting into diagnosis — and it supports both warranty claims and resale value.
Maintenance Schedule Table
| Interval | Hydraulic System Tasks |
|---|---|
| Daily / Every 8–10 Hours | Check ground for leaks • Verify fluid level in sight glass • Inspect oil color and clarity • Visual hose and fitting scan • Confirm breather is clear • Check for wet spots on the tank • Monitor oil temperature during operation |
| Weekly / Every 40–50 Hours | Clean reservoir area • Trace all hoses end to end • Check hose clamps and suction connections • Inspect cylinder rods and wiper seals • Clean cooler fins • Check return line connection • Log fluid level trend |
| Monthly / Every 200 Hours | Remove panels for full tank inspection • Examine weld seams • Torque-check critical fittings • Pull and evaluate a fluid sample • Check filter condition and bypass indicator • Inspect tank mounts and isolators • Check suction strainer |
| Quarterly / Every 500 Hours | Replace hydraulic filters • Replace breather cap • Professional pressure test • Lab oil analysis • Relief valve verification • Full hose age and condition audit • Inspect quick couplers |
| Annually / 1,000+ Hours or Per Manual | Hydraulic oil change per the manual’s interval • Suction strainer replacement • Reservoir interior inspection and cleaning • Complete system leak audit • Hose replacement based on age and condition • Full dealer service inspection |
Important: Intervals vary by machine, duty cycle, and operating environment. Machines in dusty, hot, or high-duty applications need shorter intervals. Always follow the schedule in your specific model’s operation and maintenance manual.
TYPHON Machinery Recommendations
TYPHON Machinery publishes operation and maintenance manuals for its equipment lines — including the TERROR series mini excavators, the KUVUO and NAGA 4-ton machines, the TYRANT 17, the 18 FLEX, the STOMP mini skid steer loaders, the SKOOP telescopic wheel loader; and the FURY road rollers. These manuals are the authoritative source for your specific machine’s service intervals, fluid capacities, and pressure specifications.
Preventing a hydraulic tank leaking condition starts with following the manufacturer’s own service guidance. The information below reflects what TYPHON documents publicly. Where a number matters—capacity, pressure, torque, or interval—take it from your own machine’s manual, not from any article, including this one.
Daily Inspection
Perform a walkaround before every shift. Check for fluid on the ground; verify the hydraulic oil level in the sight glass with the machine parked level and attachments lowered; and scan hoses, fittings, and the reservoir for wet spots. Report anything unusual before starting work.
Hydraulic Oil Checks and Specification
TYPHON’s published guidance calls for anti-wear hydraulic oil meeting ISO VG 46 for most operating conditions, with ISO VG 32 in cold climates and ISO VG 68 for sustained heat and heavy-duty work. Use OEM-grade fluid or a reputable equivalent that meets the specification. Verify the exact grade for your model in its manual.
Oil and Filter Change Intervals
TYPHON’s maintenance content indicates hydraulic oil change intervals in the range of several hundred to roughly a thousand-plus operating hours depending on the machine and duty cycle, or annually — whichever comes first. Because published intervals differ across TYPHON’s model lines, confirm the interval for your specific machine in its operation and maintenance manual. The return line filter, located near the tank on most models, is replaced as part of the service.
Cold-Weather Operation
TYPHON’s operation manuals specify preheating the machine when hydraulic oil is cold before performing any work, using gentle bucket movement at medium engine speed first, then progressing to boom and arm functions. Skipping warm-up produces sluggish, unpredictable response and puts unnecessary stress on seals and hoses — a frequent contributor to leaks in cold-climate fleets.
Leak Inspection
Any leak — seepage, weeping, or dripping — should be identified and corrected promptly. Trace the source rather than treating the symptom, and confirm fluid level after any repair.
Hose Inspection
Check hoses for abrasion, cracking, bulging, weeping at crimps, and contact with hot or moving parts. Replace damaged assemblies rather than attempting field repairs on pressurized lines.
Seal Inspection
Inspect O-rings and seals at the drain plug, fill cap, sight glass, and all tank ports. Replace any seal that is hardened, flattened, swollen, or damaged — and replace seals as a matter of course whenever a connection is opened.
Cooling System Inspection
Keep the hydraulic cooler and radiator fins free of dust, debris, and mud. Hydraulic oil in a working compact excavator reaches high operating temperatures, and TYPHON’s manuals note the significant heat and pressure the system carries. Restricted airflow accelerates fluid degradation and seal failure.
Parts and Documentation
TYPHON maintains a manuals library covering its equipment lines, and supplies hydraulic filters, seals, quick couplers, and service kits matched to its machines. Using correctly matched parts is materially cheaper than diagnosing a leak caused by a near-fit component.
Note on specifications: This guide deliberately does not publish model-specific hydraulic pressures, torque values, or fluid capacities. Those figures differ between TYPHON models and revisions. Download the manual for your machine from TYPHON’s manuals library, or contact TYPHON Machinery support directly, before performing any adjustment or repair that depends on a specification.
18 Common Mistakes to Avoid
These are the errors that turn a small hydraulic tank leaking issue into a major repair bill.
1. Topping off instead of fixing the leak. Adding a gallon a week is not maintenance — it’s an expensive way to postpone a repair while contaminating the ground.
2. Searching for a pressurized leak with your hand. Fluid injection injury is a surgical emergency. Use cardboard.
3. Over-tightening fittings to stop a weep. On flare and face-seal fittings, this deforms the sealing surface and makes the leak permanent.
4. Reusing O-rings. They cost a few dollars. The comeback repair costs a day.
5. Using the wrong fluid or mixing types. Incompatible additive packages attack seals and can gel in the reservoir.
6. Overfilling the reservoir. No expansion space means oil pushes past the fill cap and foams.
7. Ignoring the breather cap. A plugged breather pressurizes the tank and forces oil past healthy seals. This one item causes an astonishing number of unexplained leaks.
8. Welding a tank that hasn’t been fully drained, cleaned, and purged. Residual hydraulic vapor is flammable. This has hurt people.
9. Pressure-washing directly at seals, the fill cap, and the sight glass. High-pressure water drives past seals and into the oil.
10. Blowing out the reservoir with shop air. Compressed air carries moisture and oil mist straight into your clean tank.
11. Skipping filter changes because the machine “feels fine.” By the time you feel it, wear has already happened.
12. Running a machine that’s making metal. Chips circulate and damage everything downstream.
13. Diagnosing with a dirty machine. You cannot trace a leak through caked grime. Clean first, then run, then look.
14. Assuming the tank cracked because the tank is wet. Oil runs down. Trace upward before condemning a reservoir.
15. Adjusting relief valves without a specification. Guessing at pressure settings blows seals throughout the system.
16. Using thread sealant on JIC or ORFS fittings. It doesn’t seal anything there, and it sheds into your oil.
17. Treating a temporary epoxy patch as a repair. It’s a way to get to the shop. Nothing more.
18. Keeping no maintenance records. Without a log, every diagnosis starts from zero, and warranty conversations get difficult.
When to Call a Professional Technician
DIY has a clear boundary, and a hydraulic tank leaking problem often sits right on it. Call a qualified technician or your authorized dealer when:
- The tank has a crack or weld failure. Welding a reservoir requires proper cleaning, purging, and certification.
- Fluid level drops with no visible leak. That’s an internal leak or a vacuum-side problem, and it needs flow testing to find.
- You see metal in the oil or on the drain plug. Stop operating and get a diagnosis.
- The pump is whining, screaming, or knocking. Cavitation damage compounds fast.
- Pressure readings are outside specification. Relief valve and pump work belongs in trained hands.
- The machine is under warranty. Unauthorized repairs can void coverage. Call the dealer first, always.
- Multiple leaks appear at once. That pattern usually means a systemic cause — excess pressure, wrong fluid, or severe overheating — not bad luck.
- You don’t have the manual specifications. Guessing at torque or pressure creates the next failure.
- Hydraulic oil sprayed under pressure, or anyone was exposed to a fluid jet. Seek immediate medical attention for any suspected injection injury, even if the entry wound looks trivial.
- The repair requires opening the pump, motors, or main control valve.
- You’re operating a rental or commercial fleet where documented professional service protects you legally and commercially.
There’s no shame in outsourcing. A good technician with a flow meter and the correct manual will find in an hour what a determined DIYer chases for a weekend.
Frequently Asked Questions
1. Why is my hydraulic tank leaking? Most hydraulic tank leaking issues trace back to a worn O-ring, a loose or over-torqued fitting, a cracked weld, a failed drain plug gasket, or a clogged breather cap that pressurizes the reservoir. Heat, vibration, and contaminated fluid accelerate all of these. Clean the area, run the machine, and trace the leak to its highest wet point.
2. Can I drive or operate a mini excavator with a hydraulic leak? No. Even a slow leak drops the fluid level, lets air into the system, and risks pump cavitation and overheating. There’s also a real fire and slip hazard, plus environmental liability. Shut the machine down, identify the source of the hydraulic tank leaking, and repair it before returning the excavator to work.
3. How much does hydraulic tank repair cost? A seal or O-ring replacement typically runs under $200 at a shop. Hose replacement generally falls between $150 and $500. Professional tank welding often lands in the $400–$1,200 range, and full tank replacement can reach $1,200–$4,500. Costs vary widely by model and region — get a written estimate from your dealer.
4. Can I use a sealant or epoxy to fix a hydraulic tank leak? Only as a temporary measure to move the machine off the job site. Two-part epoxy can hold a pinhole for hours or days on a clean, dry, abraded surface. It will not survive vibration, heat cycling, and thermal expansion long term. Schedule a proper repair immediately after.
5. Is it safe to weld a hydraulic tank? Only when the tank is completely drained, flushed, steam-cleaned, and fully vented of oil vapor, and only by a certified welder. Residual hydraulic vapor is flammable and reservoirs have exploded during careless repairs. Remove all seals and sensors first, and clean the interior afterward to remove weld spatter.
6. How do I find a hydraulic leak I can’t see? Pressure-wash and dry the entire area, dust it with foot powder or talc, then run the machine through a full work cycle. The origin will show clearly against clean, powdered metal. UV leak-detection dye works even better. Always trace upward, because oil runs down and pools far from its source.
7. What does foamy hydraulic oil mean? Foaming means air is entering the system — usually through a suction hose leak, a fluid level low enough to expose the strainer, an overfilled tank with no separation space, or the wrong fluid grade. Oil foaming causes cavitation and jerky controls. Correct the level, find the air path, and confirm your fluid specification.
8. How often should I check my hydraulic fluid level? Daily, before every shift, with the machine parked level and attachments lowered to the ground. Check it again at operating temperature during weekly service. Recording the level each day is what lets you spot a slow hydraulic oil loss trend before it turns into visible damage.
9. What hydraulic oil should I use in a TYPHON mini excavator? TYPHON’s published guidance specifies anti-wear hydraulic oil meeting ISO VG 46 for most conditions, ISO VG 32 in cold climates, and ISO VG 68 for sustained heat and heavy work. Always confirm the exact grade for your specific model in its operation and maintenance manual or by contacting TYPHON Machinery support.
10. Can a clogged breather cap cause a hydraulic tank to leak? Absolutely — and it’s one of the most overlooked causes. The breather equalizes reservoir pressure as fluid heats and expands. When it plugs with dust, the tank pressurizes and forces oil past seals that were sealing perfectly at atmospheric pressure. A new breather cap costs very little and fixes it.
11. What happens if hydraulic oil gets too low? The suction strainer starts pulling air, causing foaming, cavitation, and rapid pump wear. Cooling capacity drops, oil overheats and degrades, and seals throughout the machine fail faster. You’ll also notice slow boom response, weak breakout force, and noise. Never operate below the manufacturer’s minimum level mark.
12. How do I know if my hydraulic tank is cracked or just leaking from a fitting? Clean the entire area, dry it, then run the machine and observe. Oil originating from a crack appears at a specific point on the shell or a weld seam, often near a bracket or port boss. Oil from a fitting collects above the tank and runs down. Trace to the highest wet point, because that’s where the hydraulic tank leaking actually begins.
13. What is a hydraulic fluid injection injury? It happens when pressurized hydraulic oil penetrates skin through a pinhole leak. The entry wound often looks minor — a small dot — but the injected fluid causes severe internal tissue damage. It’s a surgical emergency requiring treatment within hours to prevent amputation. Never touch a suspected pressurized leak.
14. How long does hydraulic tank repair take? An O-ring or seal replacement takes 30–60 minutes. A hose replacement runs one to two hours. Professional tank welding typically takes three to six hours, including cleaning and purging. Full tank replacement can take four to ten hours depending on machine access and how much has to come apart.
15. Does hydraulic oil contamination cause leaks? Yes, in two ways. Abrasive particles score sealing surfaces and cylinder rods, creating leak paths. Water and degraded fluid chemically attack seal compounds, hardening or swelling them until they fail. Hydraulic oil contamination is the most common root cause behind machines that develop leaks at several points at once.
16. Should I flush the hydraulic system after fixing a leak? Flush if the leak allowed contamination in, if you found water or metal in the oil, if the fluid is dark or burnt, or if a component failed internally. For a simple O-ring replacement on clean, healthy fluid, a top-up and filter check is usually sufficient. When in doubt, flush — it’s cheaper than a pump.
17. Can I mix different brands of hydraulic oil? Avoid it unless compatibility is confirmed. Different additive packages can react, forming sludge and gels that attack seals and plug filters. In an emergency, adding a small amount of the same viscosity grade and type will get you home, but plan a full drain and refill with the specified fluid soon after.
18. Why does my hydraulic oil overheat after a leak? Less oil in the system means less thermal mass and less surface area for heat rejection, so temperature climbs faster and stays higher. Overheating then degrades the fluid, hardens seals, and creates more leaks — a self-feeding cycle. A dirty cooler makes it worse. Restore the correct level and clean the cooler.
19. How often should hydraulic hoses be replaced? Replace immediately at any sign of exposed reinforcement wire, blistering, weeping at the crimp, or soft spots. Beyond visible damage, many manufacturers recommend replacement based on age — commonly around five to seven years — because rubber degrades even when the hose looks acceptable from the outside.
20. Is a small hydraulic seep worth fixing right away? Yes. Seepage is the earliest and cheapest stage of failure — usually a seal that costs a few dollars. Left alone, it becomes weeping, then dripping, then a running leak, and along the way it lets dirt into the system. Catching a hydraulic tank leaking issue at the seepage stage this week beats replacing a pump next quarter.
External Authority References
- OSHA — Control of Hazardous Energy (Lockout/Tagout) requirements and general machinery servicing guidance, applied here to depressurizing and isolating hydraulic systems before service.
- National Fluid Power Association (NFPA) — General fluid power safety practices regarding stored energy, pressurized fluid hazards, and safe leak detection.
- ISO 4406 — Hydraulic fluid power cleanliness code, the standard framework used for particle counting in oil analysis programs.
- ISO viscosity grading (ISO VG 32 / 46 / 68) — The classification system referenced throughout this guide for hydraulic fluid selection.
- TYPHON Machinery Operation & Maintenance Manuals — Model-specific service intervals, fluid specifications, warm-up procedures, and safety instructions, available in TYPHON’s manuals library.
These references are cited as general standards and best-practice frameworks. Always consult the current published version of any standard and your machine’s official manual for authoritative requirements.
Don’t Let a Drip Become a Downtime Disaster
Here’s the honest summary of everything above: A hydraulic tank leaking on a mini excavator is almost never a surprise. It announces itself weeks in advance – a damp seam, a slightly lower sight glass, and a faint whine at full load. The operators who catch it spend twenty dollars. The ones who don’t spend thousands.
Build the five-minute walk-around into your morning. Keep the reservoir clean so a new leak has nowhere to hide. Use the fluid your manual specifies. Replace seals whenever you open a connection. And write down what you find.
When the repair goes beyond seals and fittings – cracked tanks, metal in the oil, pressure outside the specification, or anything under warranty – call a qualified technician or your authorised dealer. Professional diagnosis is faster, safer, and cheaper than a second attempt.
Ready to keep your machine in the dirt instead of in the shop? Download the operation and maintenance manual for your specific model from TYPHON Machinery’s manuals, library, and source matched correctly hydraulic filters, seals, quick couplers, and service kits for your machine. If you’re unsure which parts fit your model, what the correct service interval is, or whether a leak needs professional attention, contact the TYPHON Machinery support team directly — they have the model documentation and can point you to the right parts and the right next step.
Your excavator will tell you when something’s wrong. All you have to do is look.
This guide is provided for general informational purposes. Specifications, intervals, torque values, and pressures vary by model and revision – always follow your machine’s official operation and maintenance manual and consult a qualified technician for repairs involving pressurised systems, welding, or warranty-covered components.